In 2020, we embarked on a transformative journey to renovate our historic masonry commercial building, built in 1816, using Passive House principles. The plan to renovate one floor at a time evolved into a whole-building energy retrofit, as the pandemic forced us into a building-wide hiatus. Through collaboration with our contractor and in-house architect teams, both well-versed in Passive House practices, we navigated unforeseen challenges and achieved Phius certification under the 2018+ Phius program.
The construction process was a true collaboration between our contractor team and Phius Certified Passive House Consultant architects. Unforeseen conditions surfaced during early construction, leading to discussions and innovative solutions to overcome hurdles, including those arising from pandemic-related materials shortages.
Here are the significant steps during construction.
Exposing the Structure
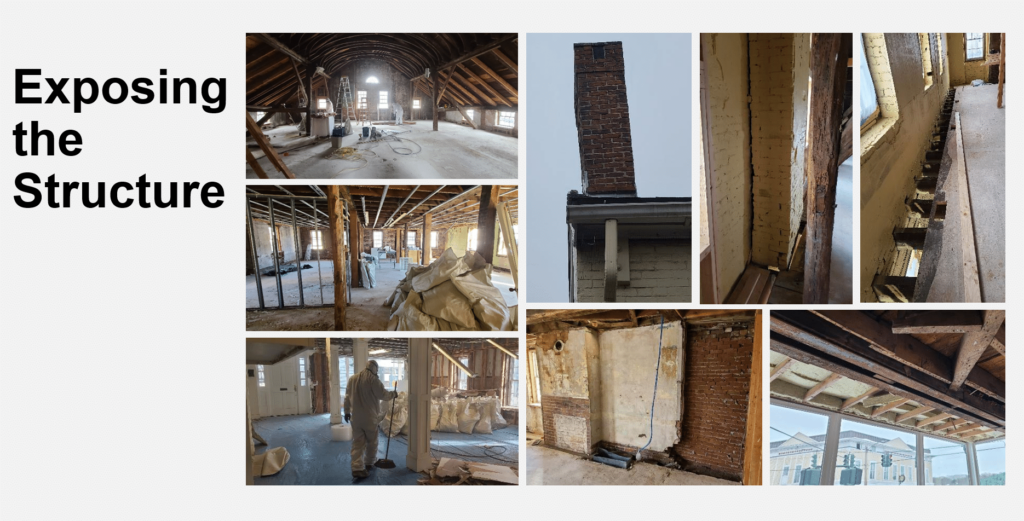
Unveiling the building’s structure revealed unexpected conditions, such as a chimney decoupling from the exterior wall. Despite its historic significance, we removed the upper chimney and rebuilt a lighter brick veneer box chimney, approved by the Historic District Commission (HDC). Other interesting finds: door and window openings from the past, pointing to various building uses over time; contemporary construction details at the building’s storefront – a clear indication that this storefront is a fairly new addition to the building; and columns of different vintages, some original, some added as late as the 1990s.
Lesson learned: Plan for unforeseen conditions in historic renovations. Expose the building elements as early as possible.
Bulk Water Control & Secondary Air Barrier
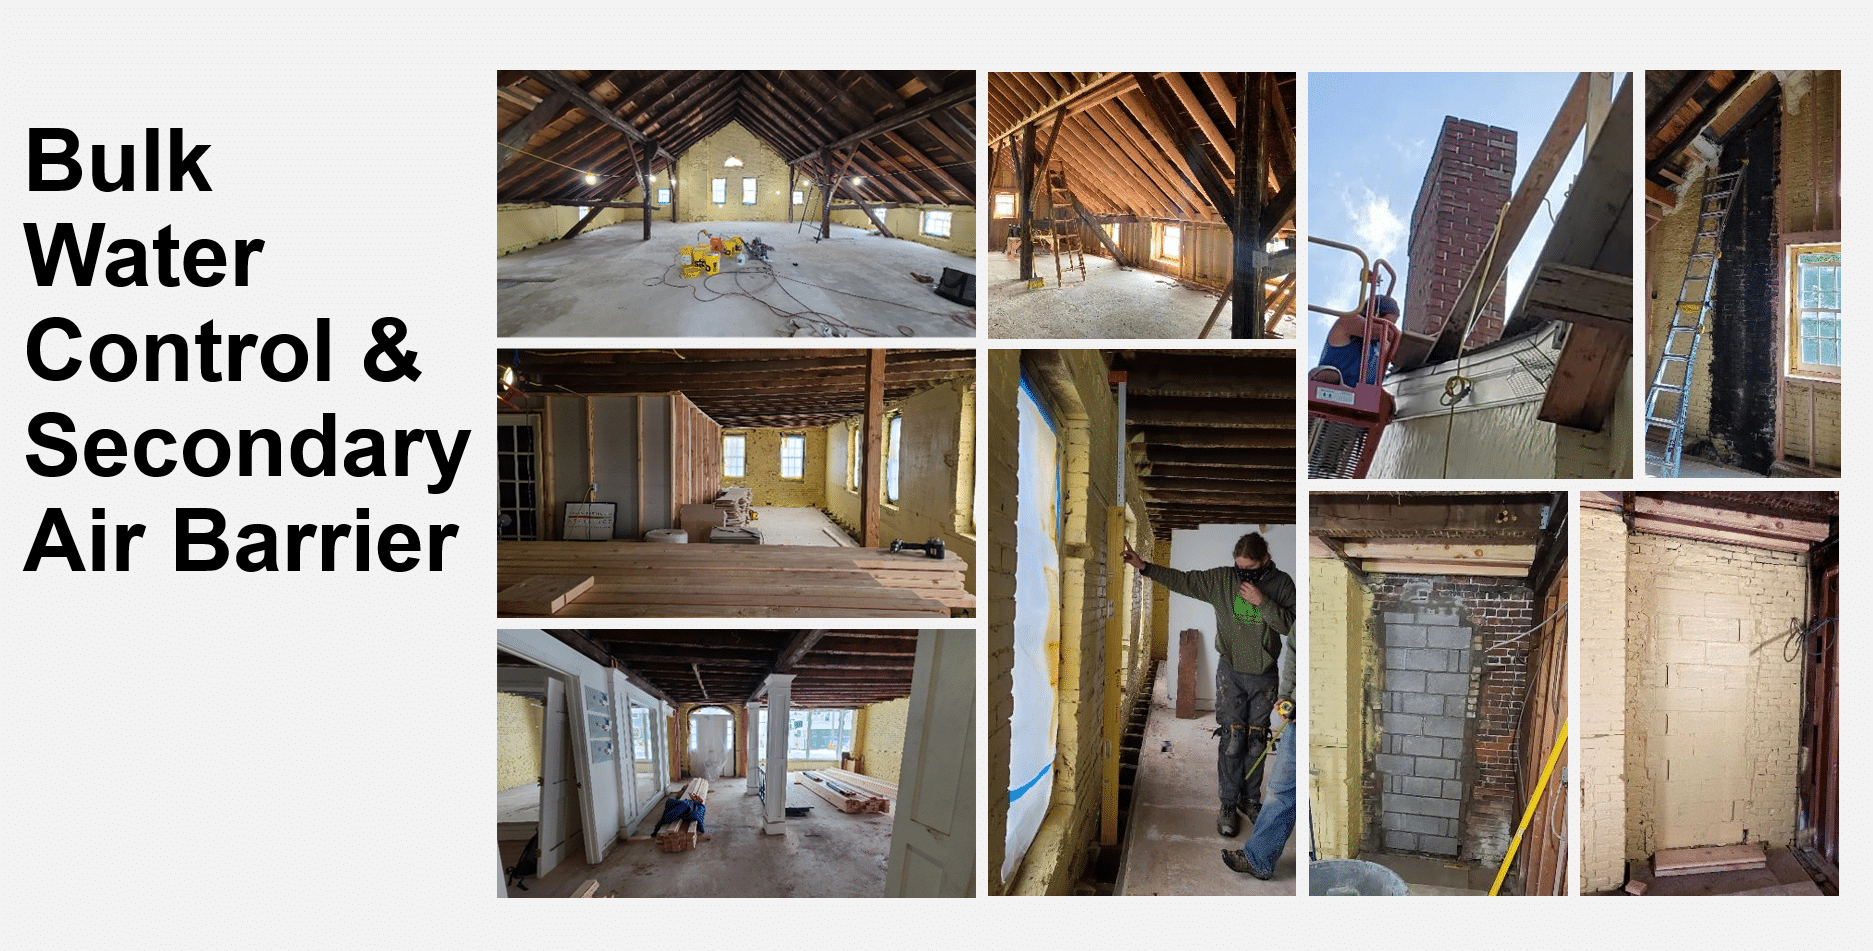
A spray-applied bulk water control product (Sto Gold) was applied to the interior of the brick exterior walls. The discovery of exterior walls being out of plumb (both vertically and horizontally) necessitated the rebuilding of framing walls to ensure a proper seal. This new framing is built a couple of inches inboard of the exterior wall to allow for continuous insulation in between.
Lesson learned: Walls out of plumb can create tricky situations. Work with the inconsistencies!
Envelope 1: Primary Air & Vapor Barrier, Windows & Doors
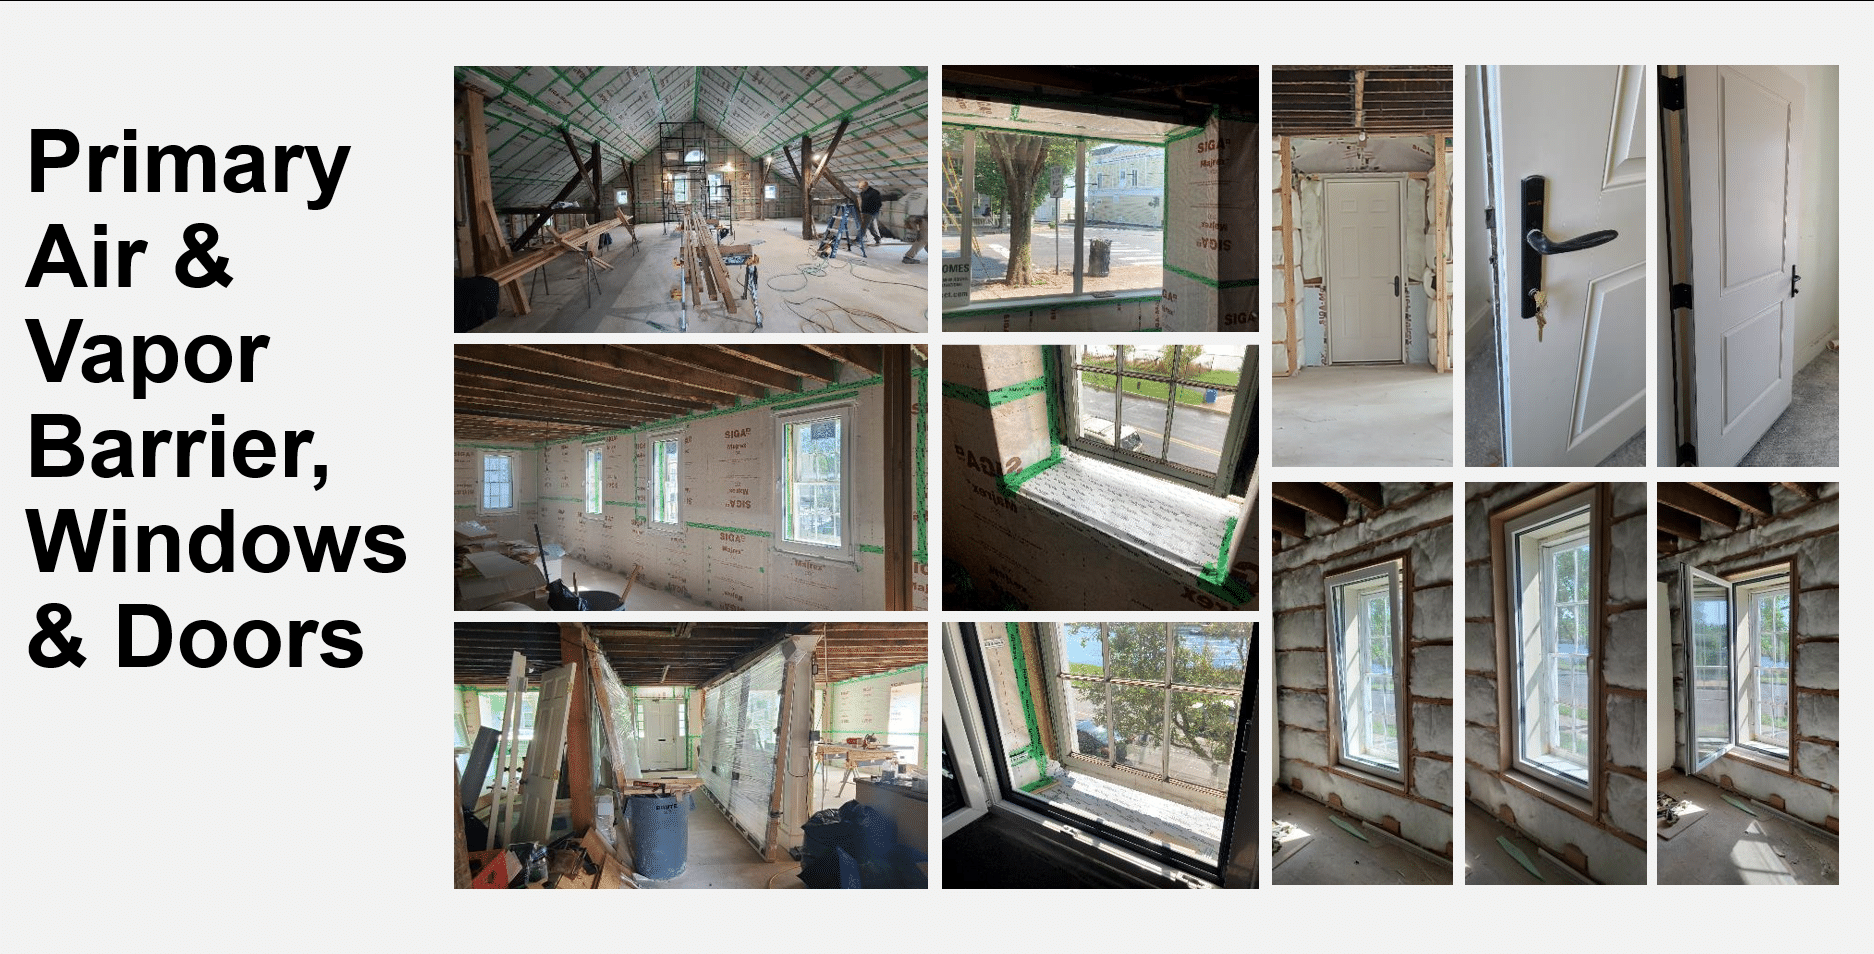
After new framing at the exterior walls, we installed an air barrier (Siga Majrex) and carefully detailed jambs, sills, and heads to receive triple-paned windows (Alpen Zenith and Alpen Tyrol) which are part of the approved Passive House envelope. Our unusual detail here: the existing exterior windows remain in place, and we installed new windows in the new framing plain.
Taping, caulking, and limited spray foam closed holes and gaps in what needs to be a continuous air barrier around the envelope.
Lesson learned: With 2 windows in the envelope, keep the outer one slightly open, allowing for air circulation and preventing condensation.
Blower Door Testing: Part 1
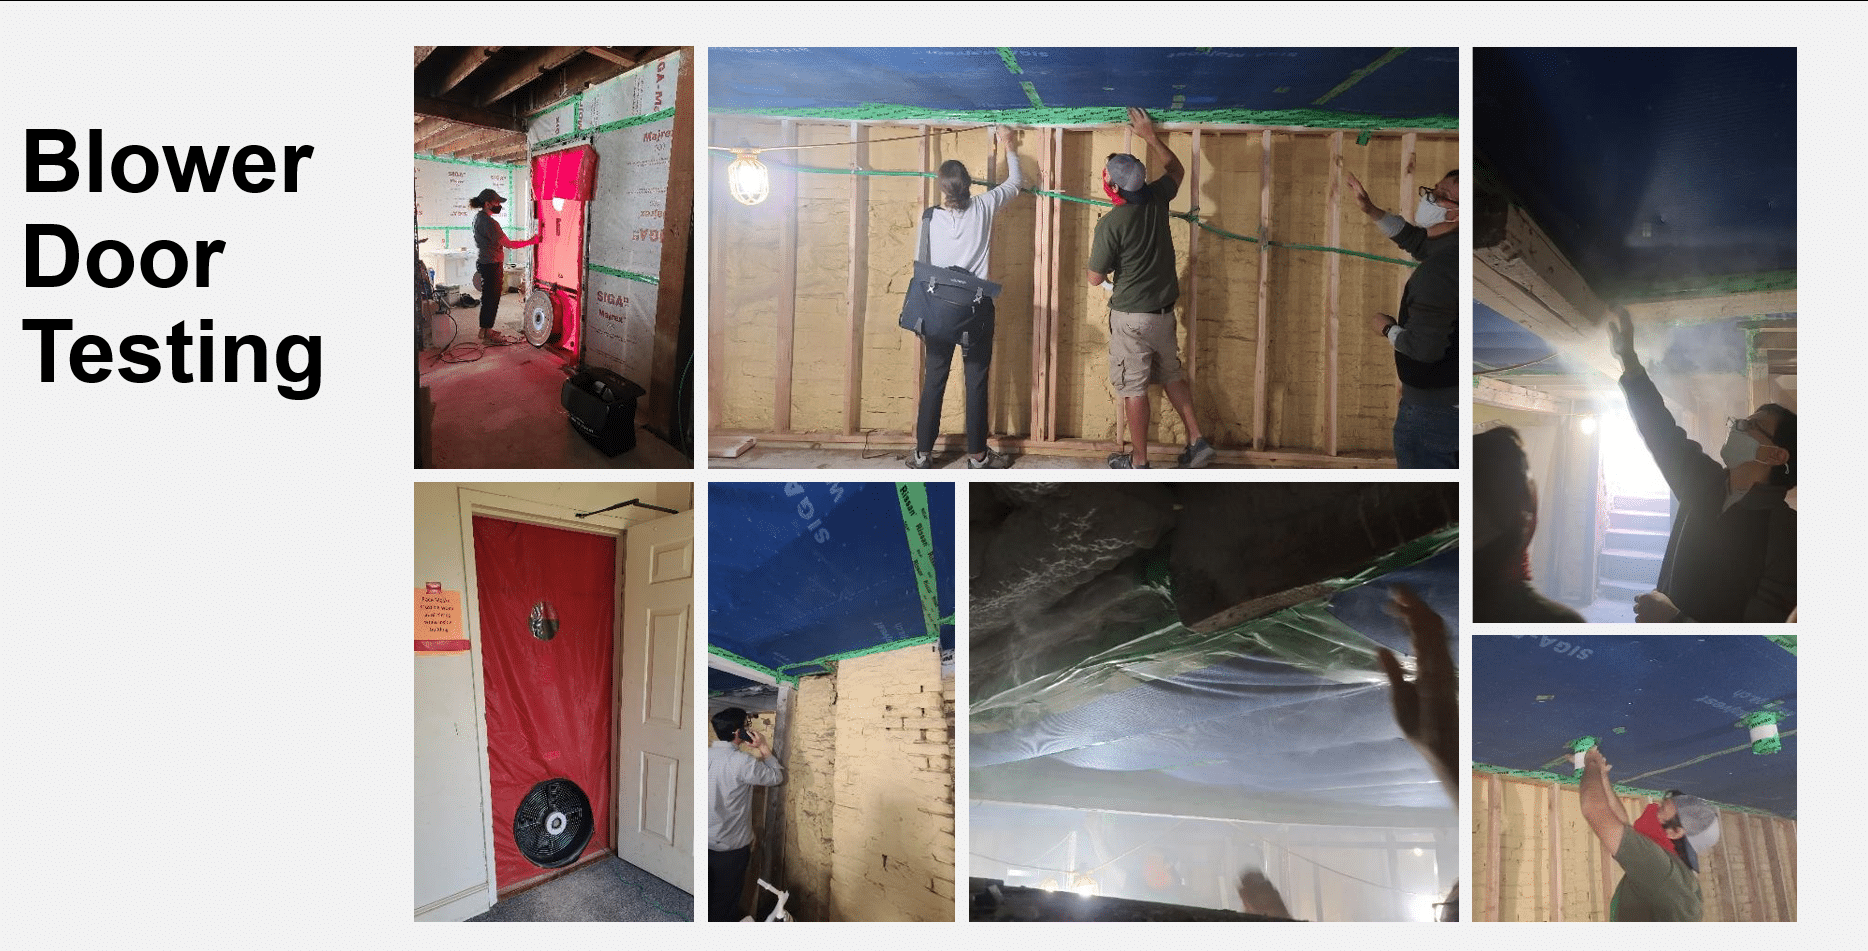
Blower door testing became a team effort, identifying and repairing air leakage in critical areas. The blower door test was located on the first floor and temporary penetrations between the floors allowed for a whole-building test of the air barrier. Tests were made in both directions – pushing air into the building and pulling air out. The most difficult areas are at beam pockets, wood beams, cracks, penetrations, storefront connections, and chimneys. The final air leakage reading surpassed the Passive House standard.
Air leakage readings, where the target is 0.060 Cubic Feet per Minute per Square Foot of building envelope (the lower, the better) :
- Rough-in: 0.085 CFM/SF of envelope
- Final: 0.048 CFM/SF of envelope
Lesson learned: Have as many people as possible available during the blower door test, especially in a whole-building test. Set up a group text and designate people to communicate by phone.
Envelope Part 2: Insulation
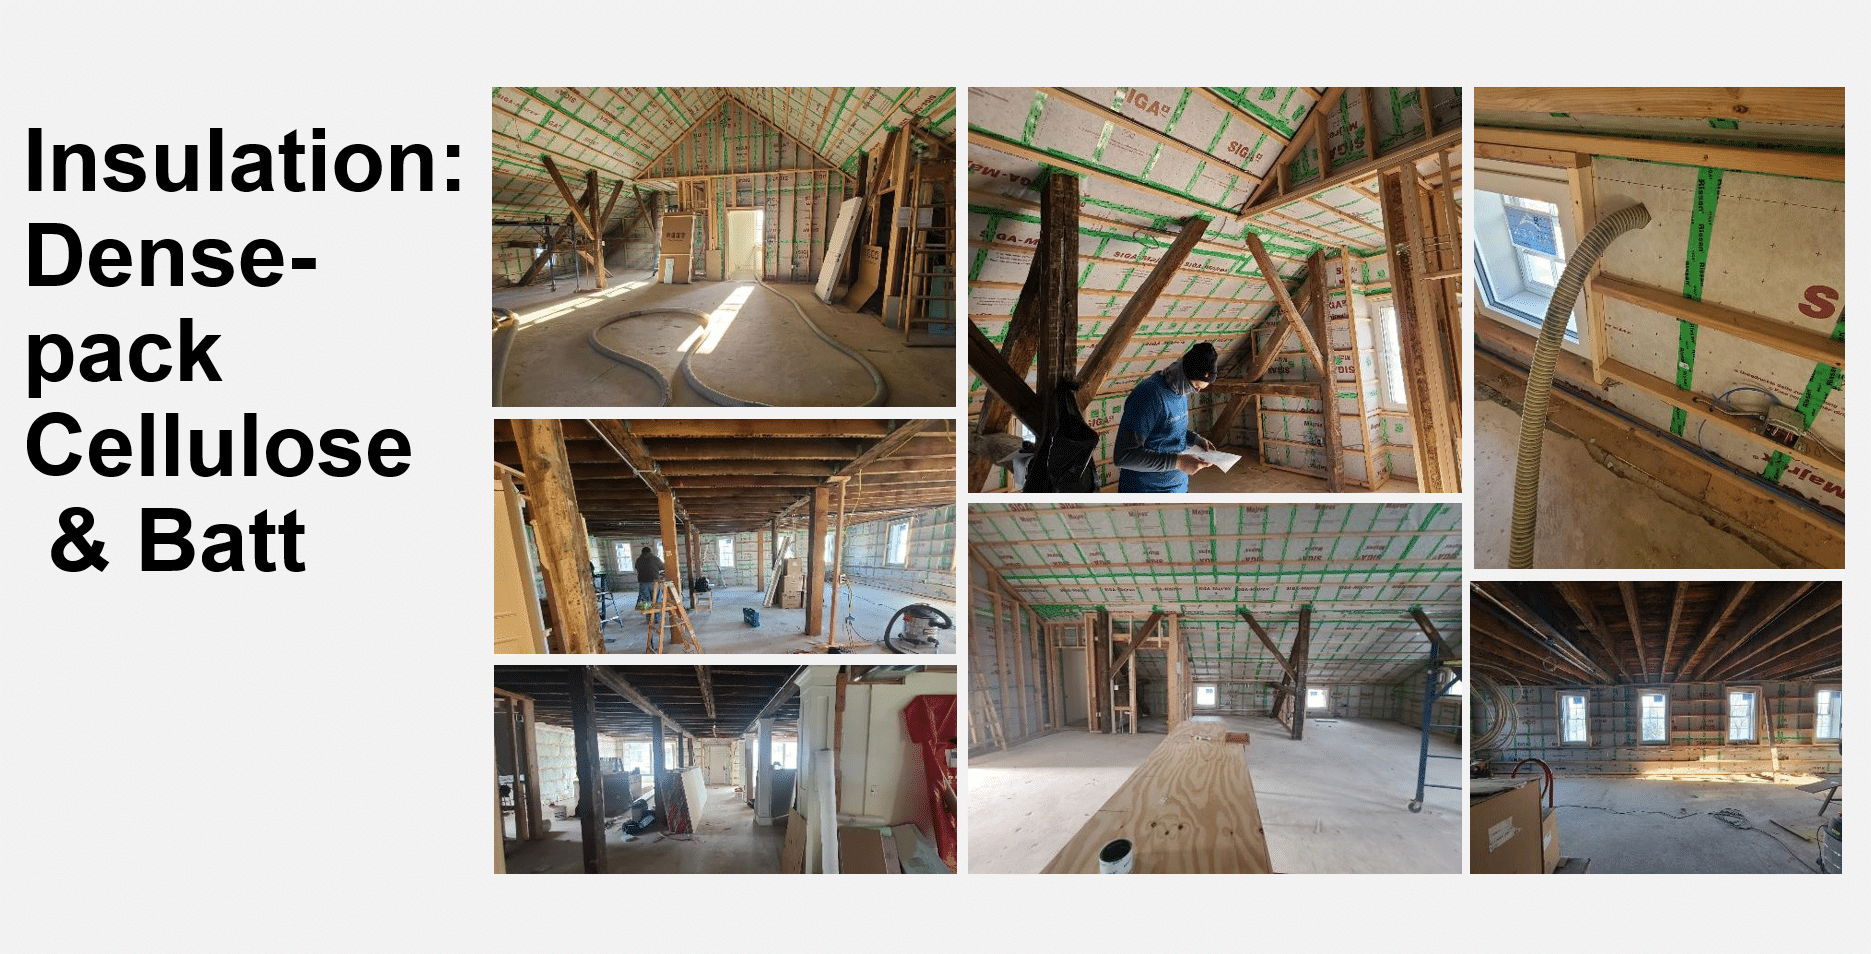
Utilizing blown-in dense-pack cellulose and foam (EPS) in strategic locations (at eaves, at certain beam pockets and storefront), insulation addressed thermal performance requirements. Challenges like material shortages were creatively addressed to meet Passive House standards. On top of the air barrier, furring strips installed horizontally allow for electrical, data, and other lines.
Lesson learned: We needed to tape all staple holes on the air barrier-to-furring connection.
Finishes 1: Sheetrock, Lighting, Exposed Mechanical Ducting
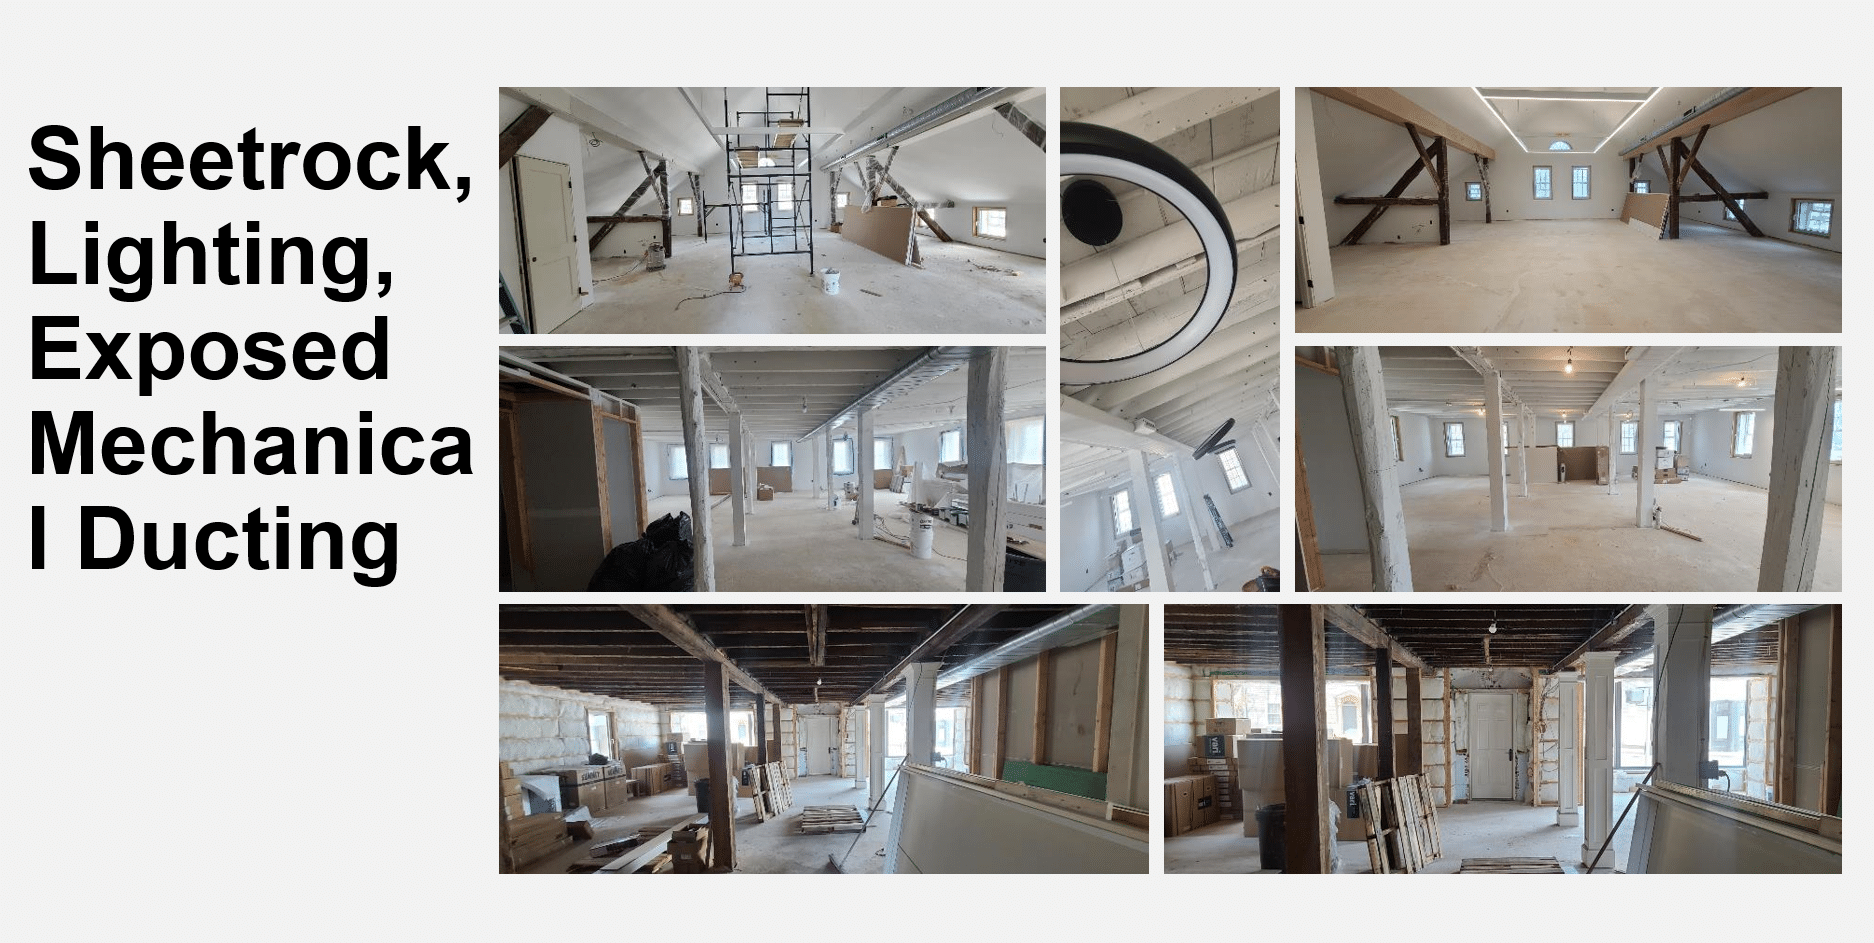
Progressing to sheetrock, mechanical ducting, ERV connections, and lighting installation, we are getting close to final finishes! We then had to finish the first floor only to the extent that a tenant could perform their own fit-out.
Lesson learned: The combination of rustic elements and sleek modern ones makes the design interesting.
Final Finishes: Flooring, Cabinetry, Painting
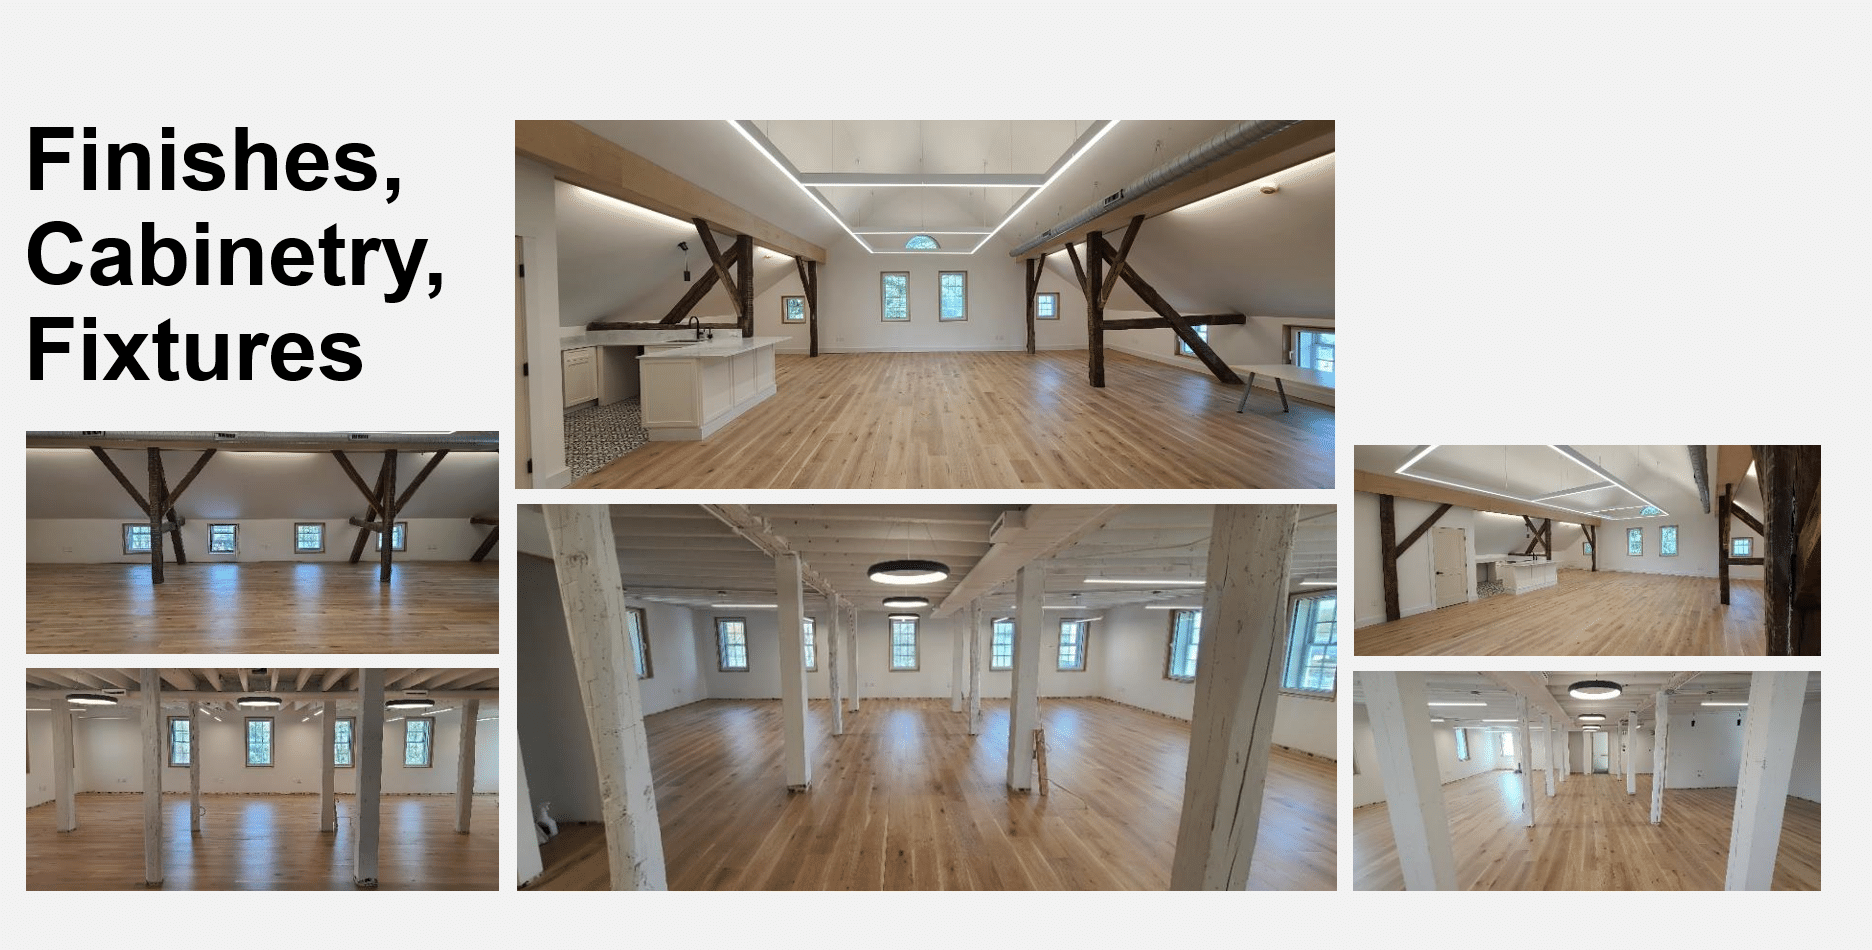
Completing the final touches on the 3rd and 2nd floors, we eagerly awaited move-in, while the first floor remained a blank canvas for the incoming tenant.
Move-In
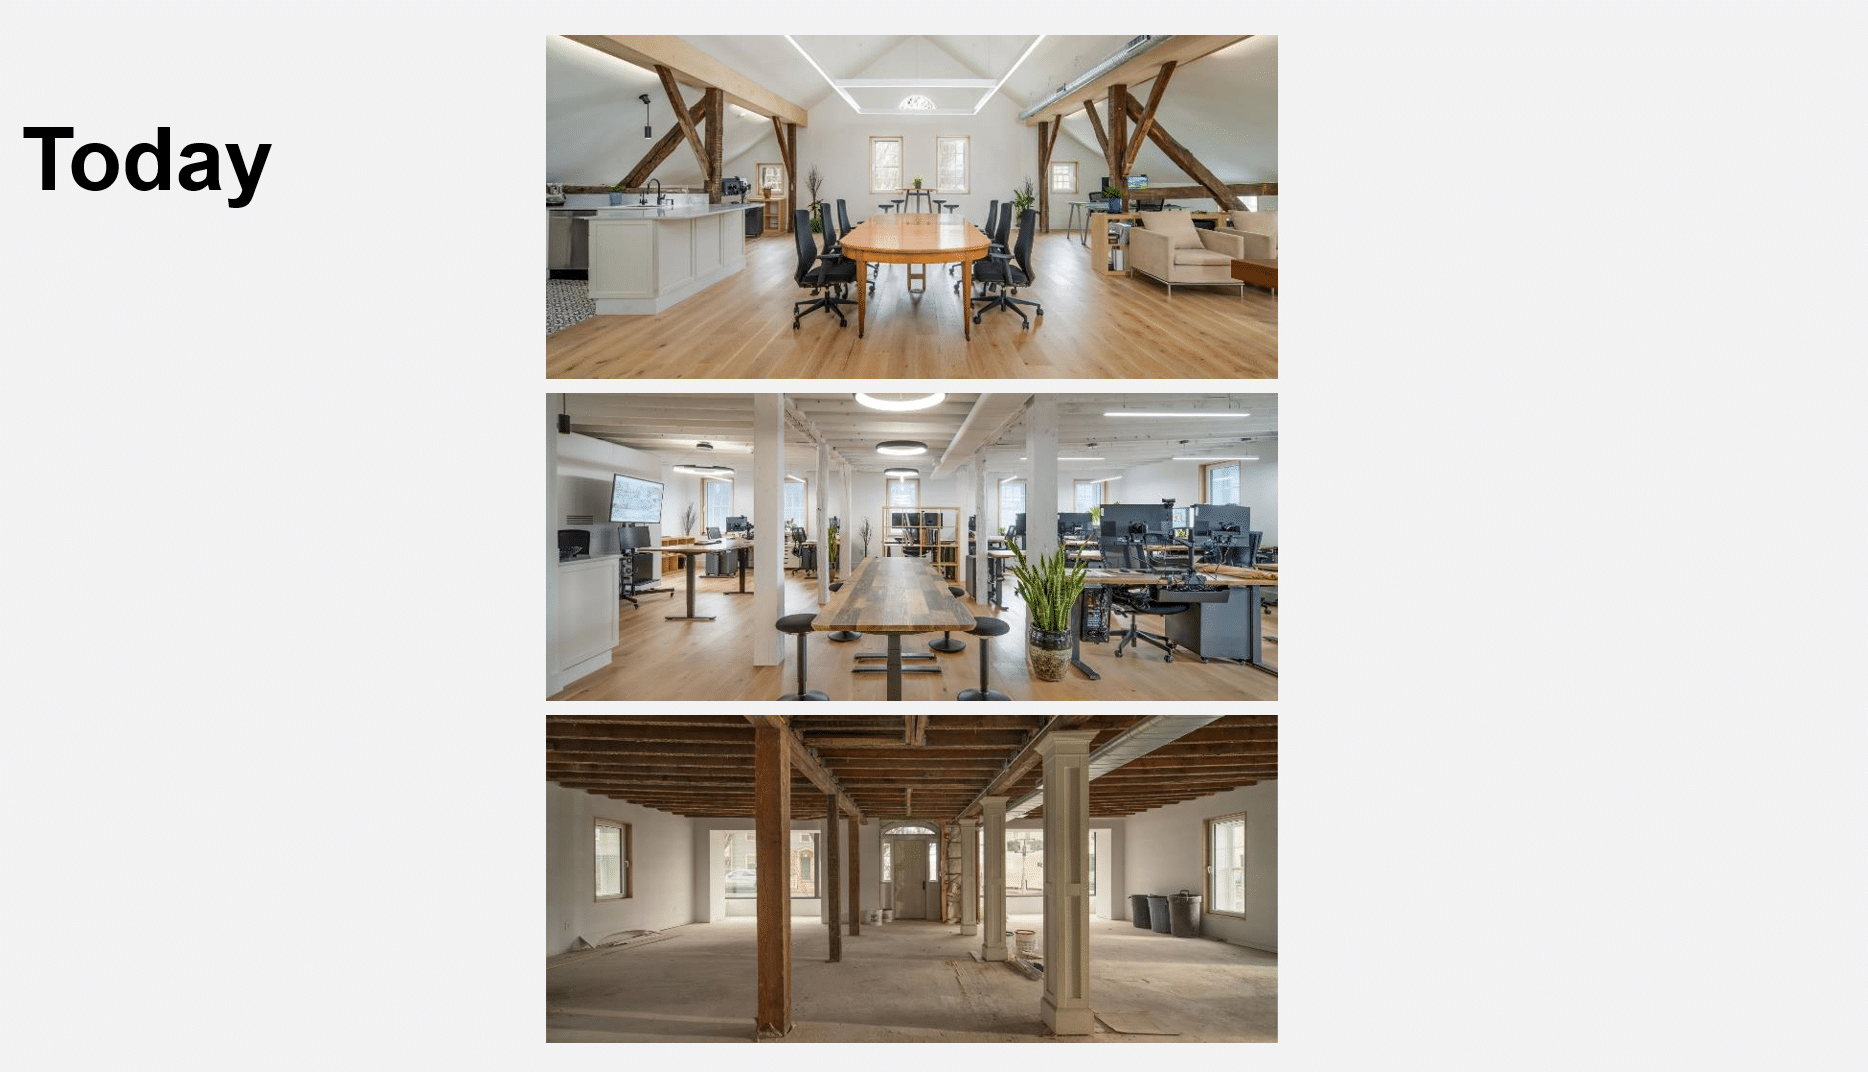
Our office successfully moved into the 3rd-floor conference spaces and 2nd-floor studio, with the first floor primed for tenant fit-out, marking the culmination of our Passive House renovation journey.
Read our previous article about ‘How We Renovated Our Historic Masonry Building using Passive Building Principles’ here; And our later article ;Measuring Progress: Interpreting EUI Findings in our Historic Passive Building Renovation’ here.
Get to Know Our Award-Winning Architectural Design Firm
Our team provides expert services on a wide variety of engagements. If you have a project in mind or simply want to know more about our firm for future reference, we’d love to hear from you! Contact us anytime.